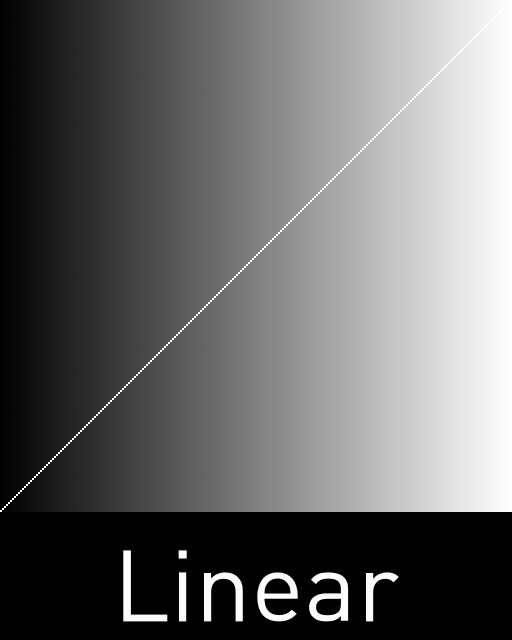
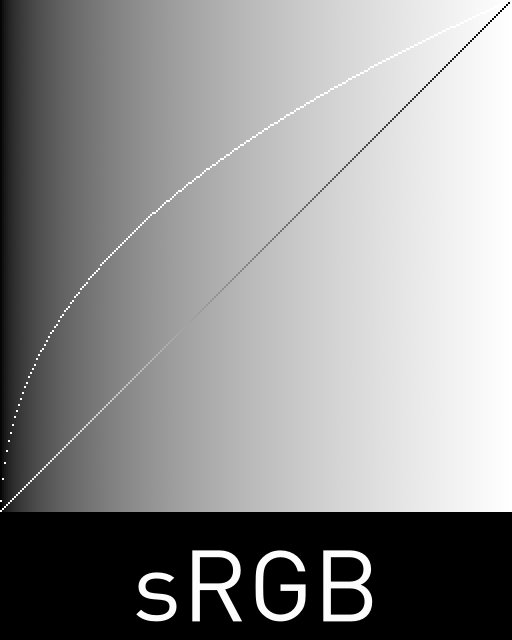
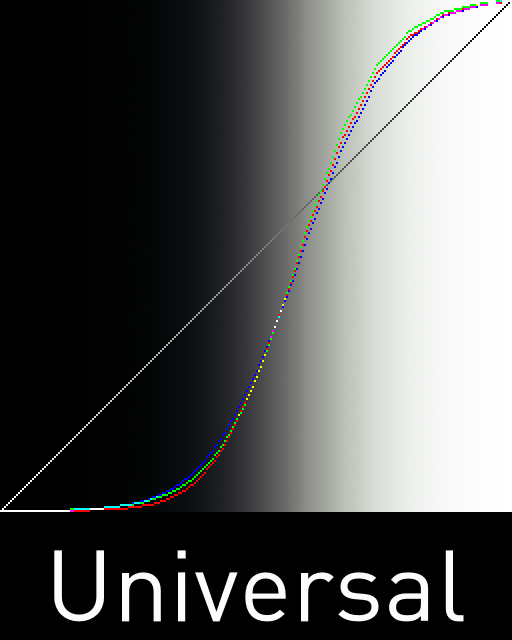
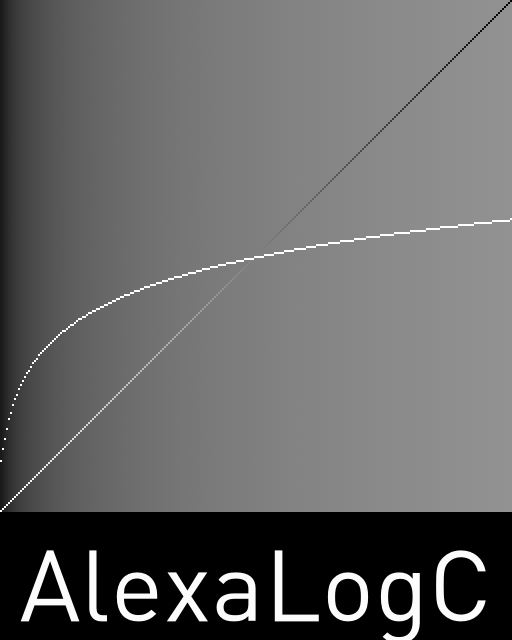
Linear vs​ Non-Linear​

Simply, it means that numerical intensity values correspond proportionally to their perceived intensity. At a 50% gray will be in the middle of a gradient range.​​

This means that the colors can be added and multiplied correctly. A color space without that property is called ”Non-linear”​

Linear – Values arranged along a straight line.
Example: 1…2…3…4…5…6
Non-Linear – Values NOT arranged along a straight line.
Example: 1…2…5…8…9…10

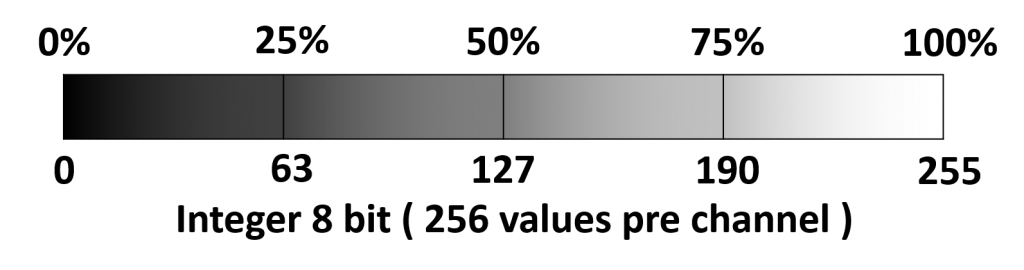
Integer vs Floating Point

Simply, it means that numerical intensity values correspond proportionally to their perceived intensity. At a 50% gray will be in the middle of a gradient range.

This means that the colors can be added and multiplied correctly. A color space without that property is called ”Non-linear”

Integer – Whole number that are not fractioned
Example: 1 , 2 , 100 , 256

Floating Point – A number that is not an Integer.
Example: 0.1 , 0.58 , 1.44 , 2.0

Clamped vs Unclamped

Simply, it means that numerical intensity values correspond proportionally to their perceived intensity. At a 50% gray will be in the middle of a gradient range.

This means that the colors can be added and multiplied correctly. A color space without that property is called ”Non-linear”

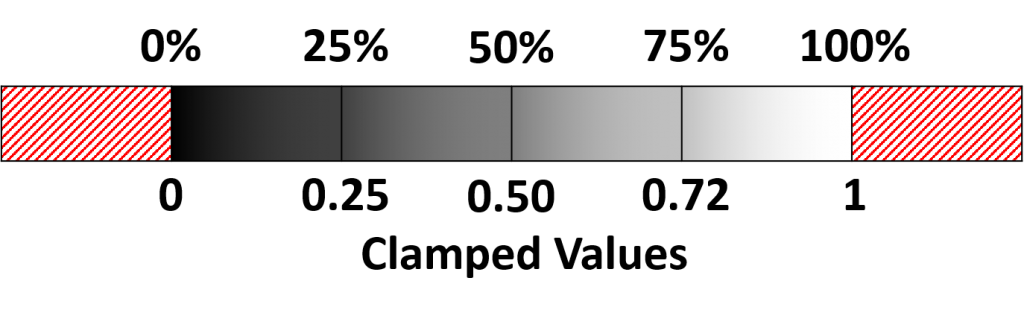
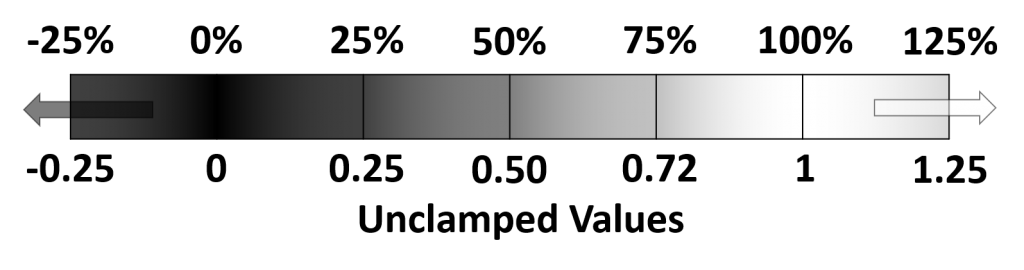
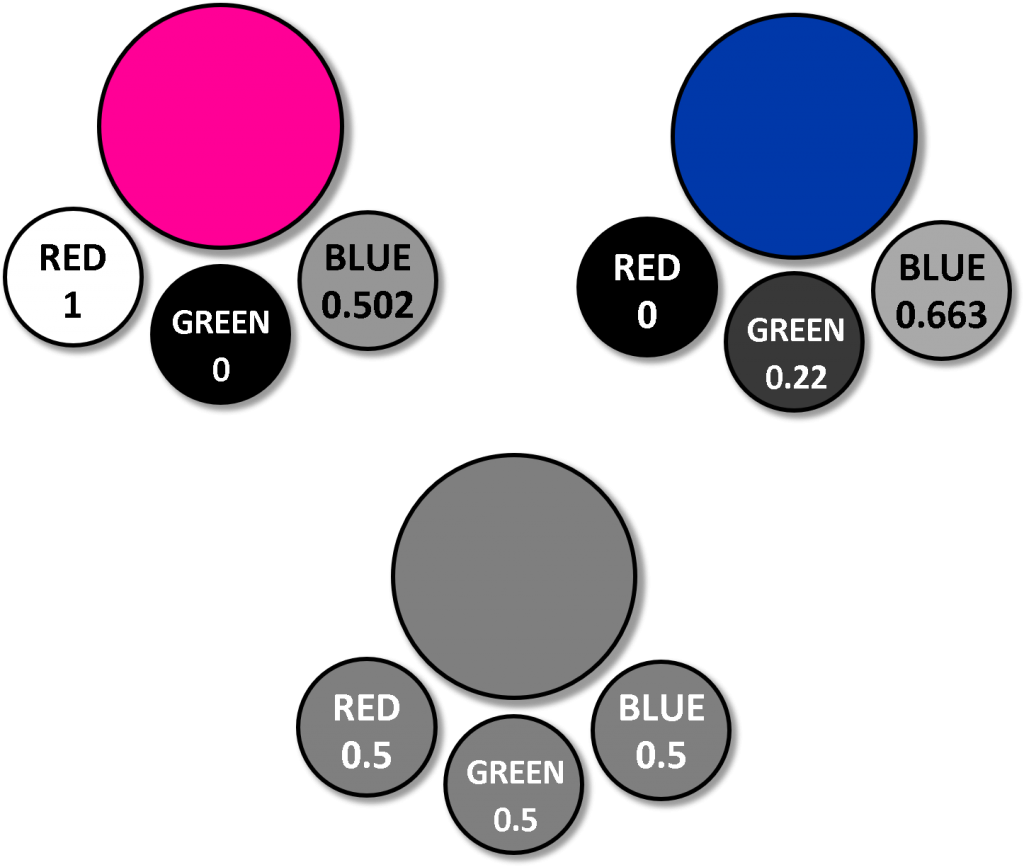
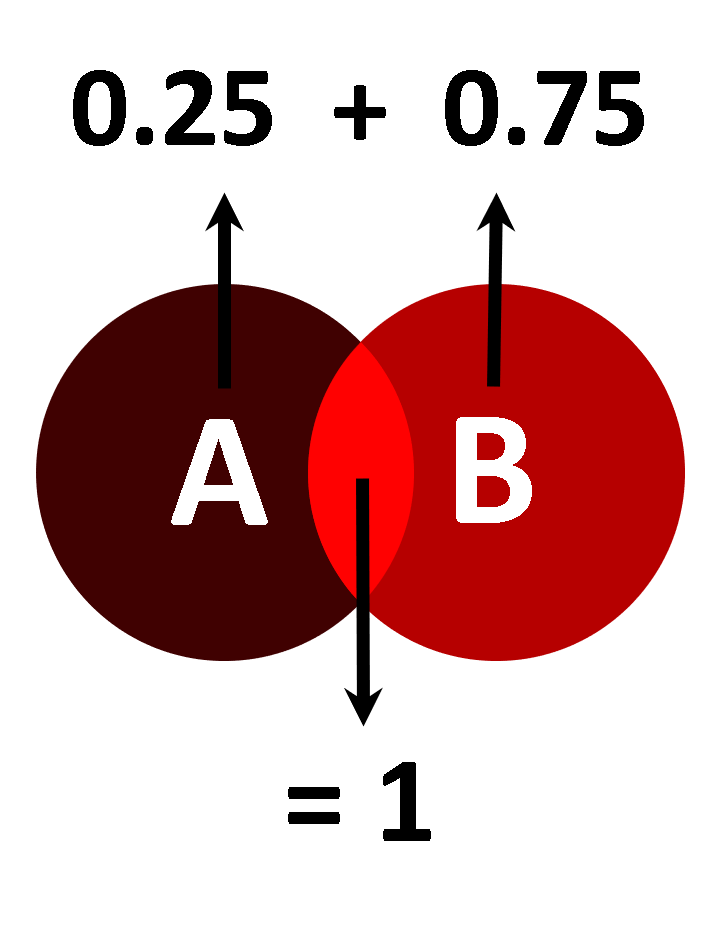
Q: Wait does this mean I can have a color that is more that 1?

A: Yes, a lot of times, highlights for example, are way over 1 in color. Because ALL the colors are not clamped to 0-1 you can use exposures to alter you image without degrading it.

Example :  Direct sunlight might have a color value of 2-10 while the viewing the sun might have a value of 10-100.

Q: So can I have negitive numbers, ones that are lower than -1?

A: Because Linear colors are based on math yes you can. Much like the first answer this mean you can use exposure to darken your image with out degrading it.

Example: The render might be too dark. but with linear workflows there might be a good chance to bring those blacks up into view-able ranges.
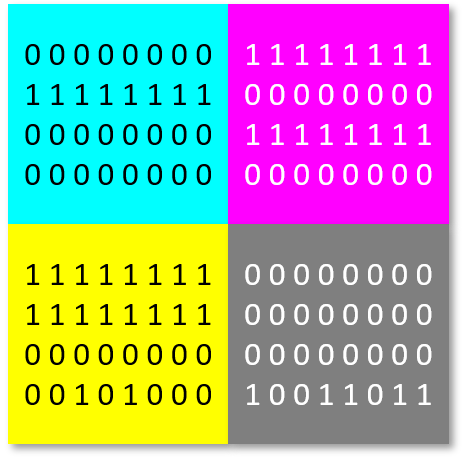
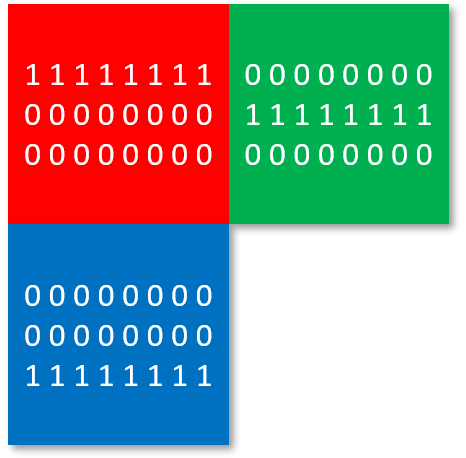
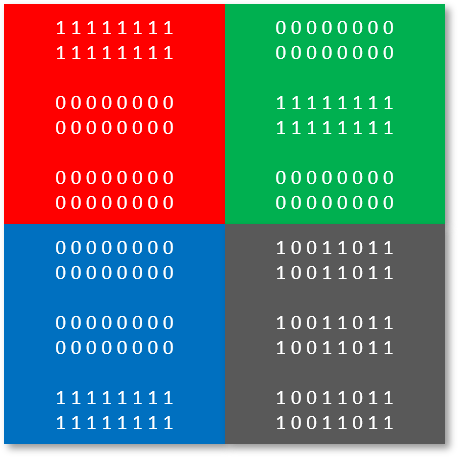
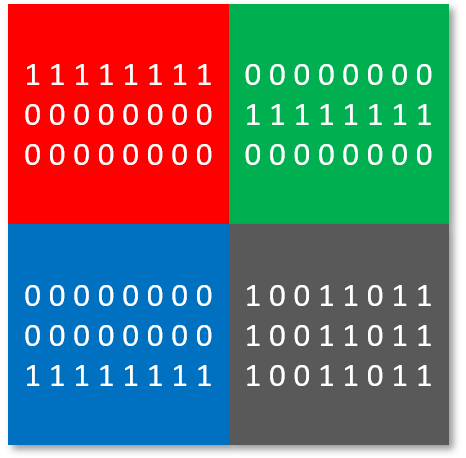
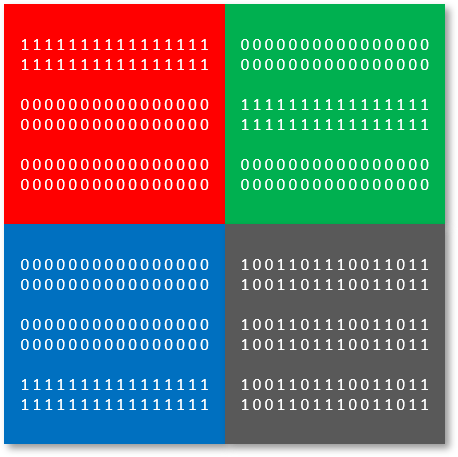
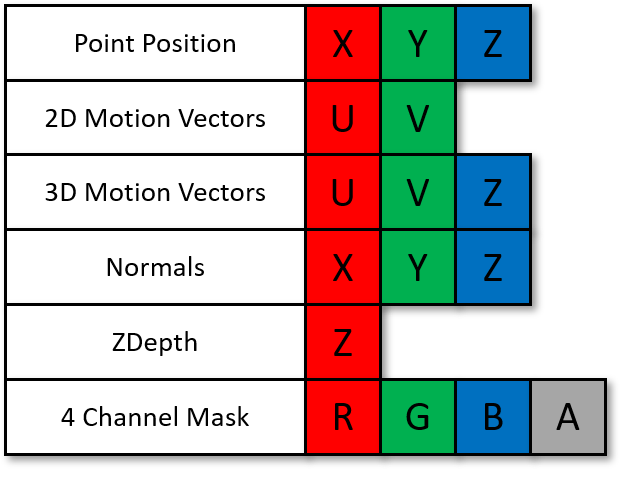
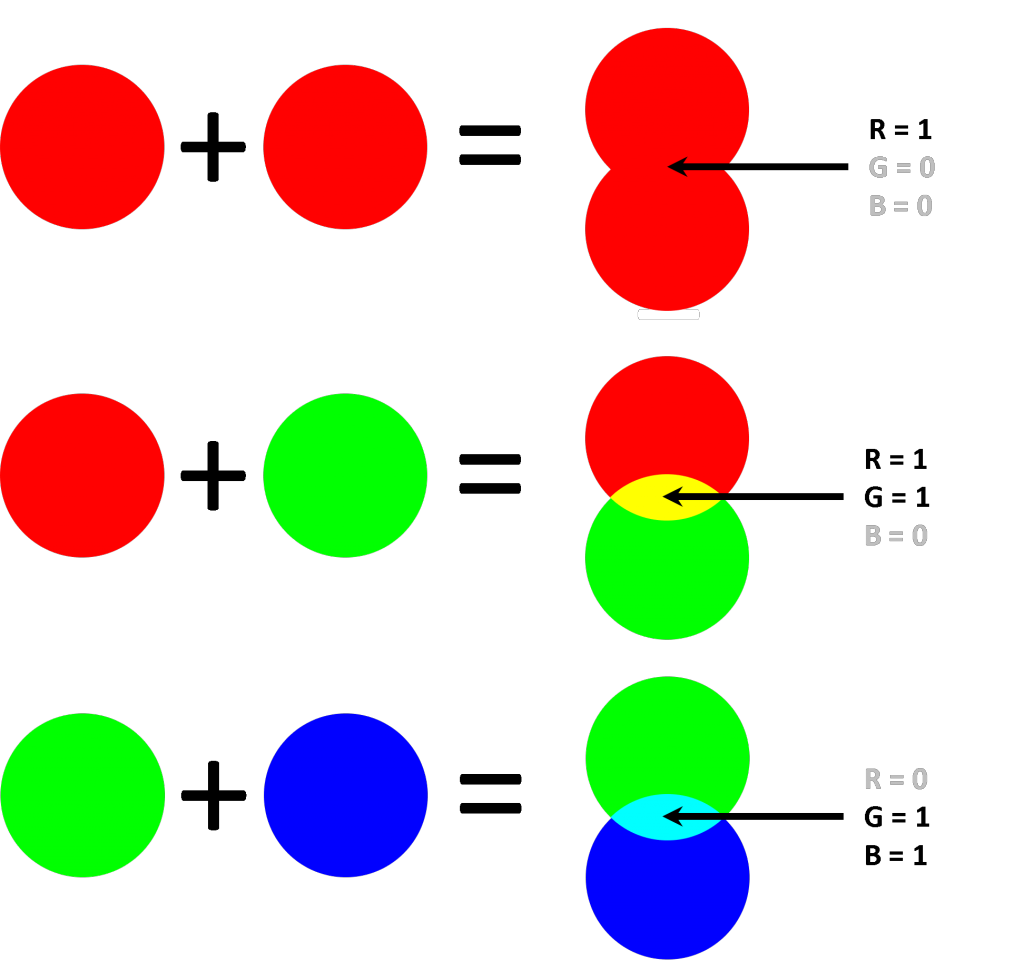
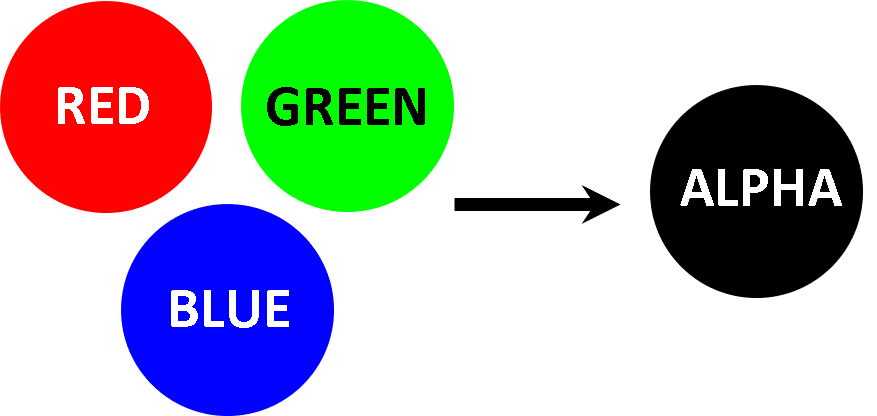
What is a ​“Channel”

In order to create color we need three primary colors RGB. Each of these need a channels to store information. Basic RGB images have 3 channels, some times they have a alpha which increases the channel count to 4. Most image formats only have a 4 channel max.

*Photoshop file allows more than 4 channels. R, G, B, A , Masks+
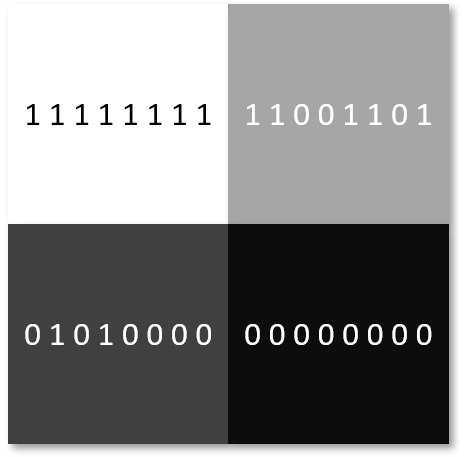
8 Bit Gray | 1 Channel

Gray – 8 Bits


256 Colors
8 Bit CMYK | 4 Channel

Cyan – 8 Bits
Magenta – 8 Bits
Yellow – 8 Bits
Black – 8 Bits

4.3 Billion Colors
8 Bit RGB | 3 Channel

Red – 8 Bits
Green – 8 Bits
Blue – 8 Bits

16.7 Million Colors
16 Bit RGB | 4 Channel

Red – 16 Bits
Green – 16 Bits
Blue – 16 Bits
Alpha – 16 Bits


281 Trillion Colors
8 Bit RGBA | 4 Channel

Red – 8 Bits
Green – 8 Bits
Blue – 8 Bits
Alpha – 8 Bits
16.7 Million Colors + 256 Alpha
32 Bit RGB | 4 Channel

Red – 32 Bits
Green – 32 Bits
Blue – 32 Bits
Alpha – 32 Bits


80 Octillion Colors

What is a ​“Layer”

Layers are collections of channels. Most common collection is RGBA.

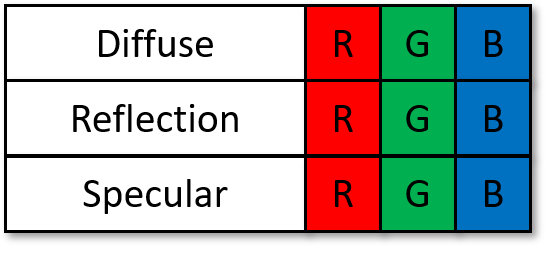
Color is made from a single RGB channels

Everything is​ A over B

Node based compositing works on simple A over B​

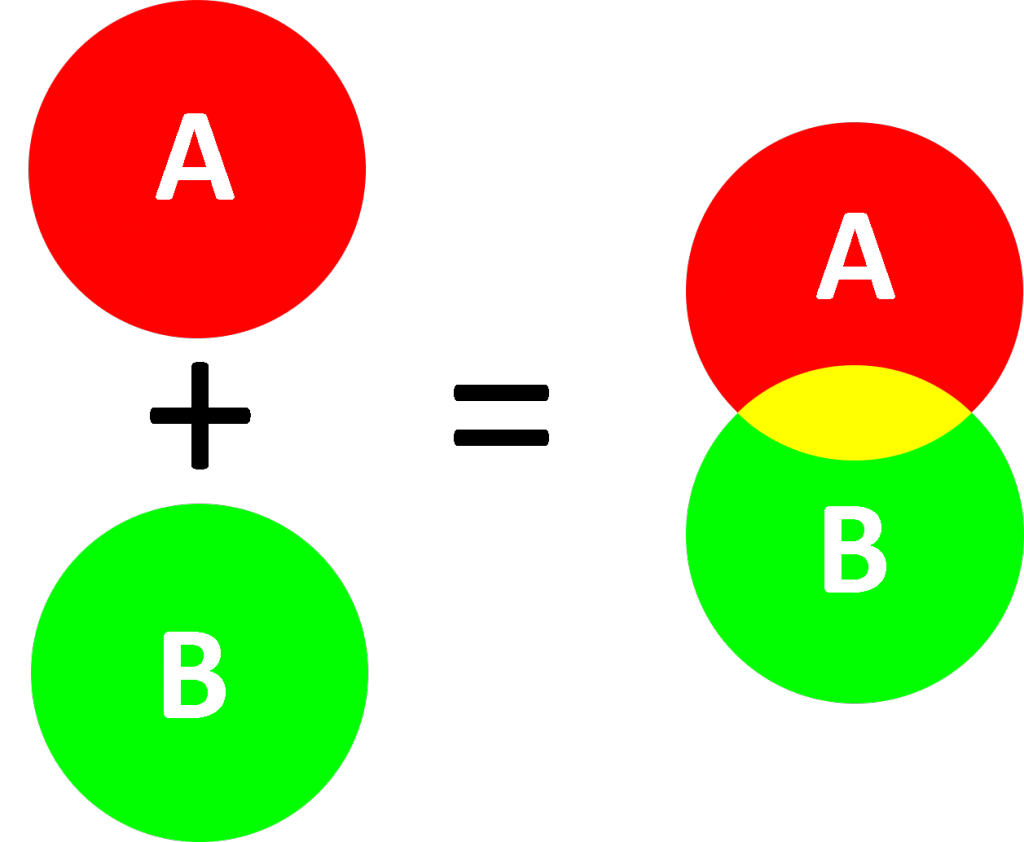
Each channel is composited instead of overall color

Using math to blend colors together​
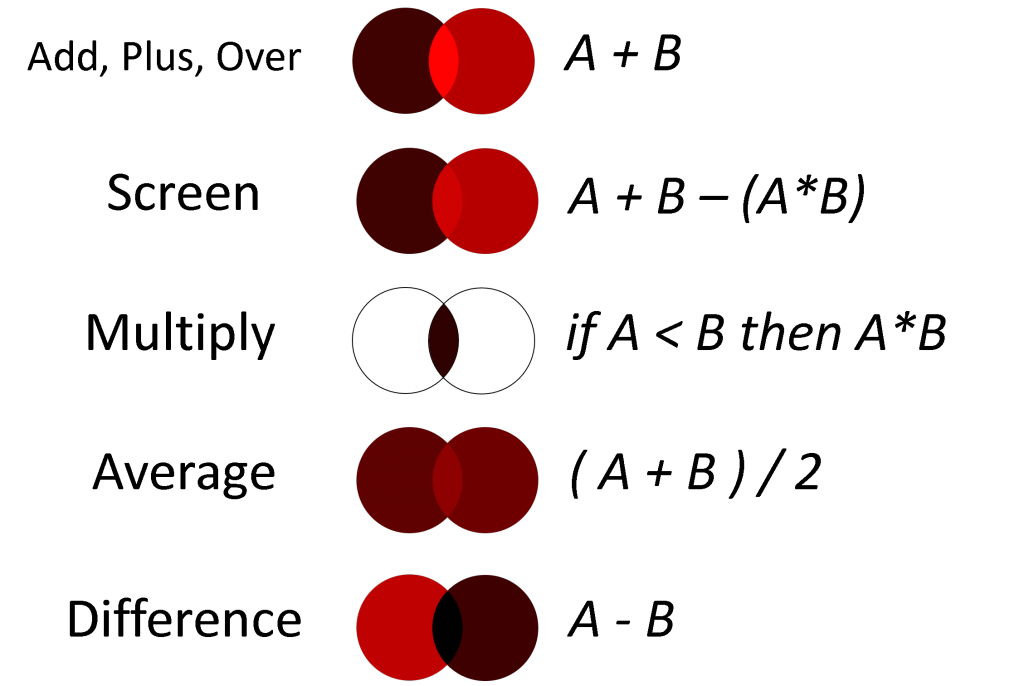
Each channel​ is composited together using a alpha value.

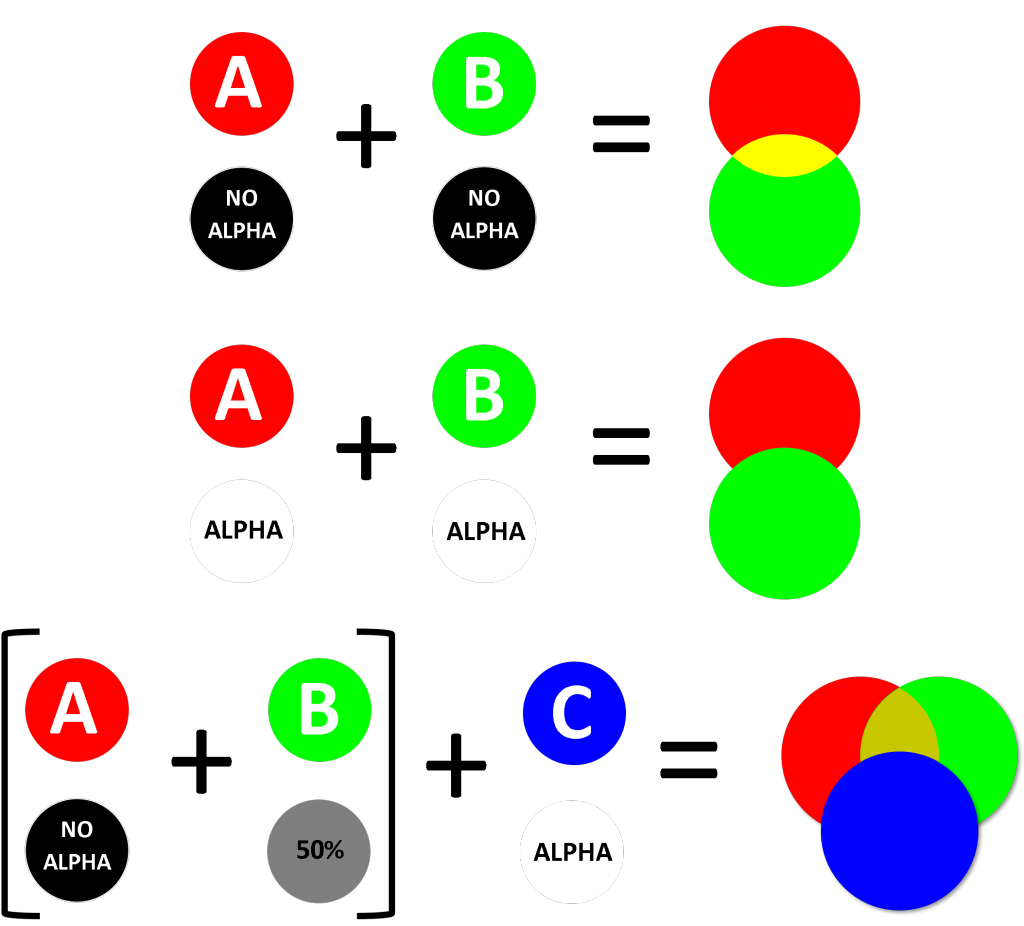
Compositing is should ALWAYS done in linear space

Look-Up Table (LUT) is mathematically precise way of taking specific linear image and modifying them to new RGB values to be seen on a different imaging system.

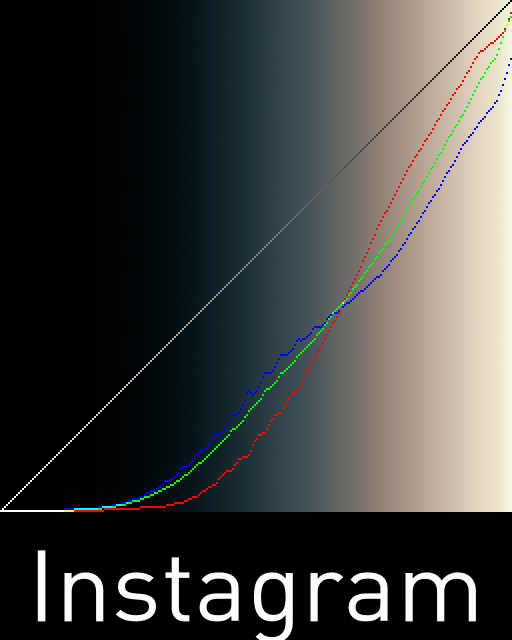
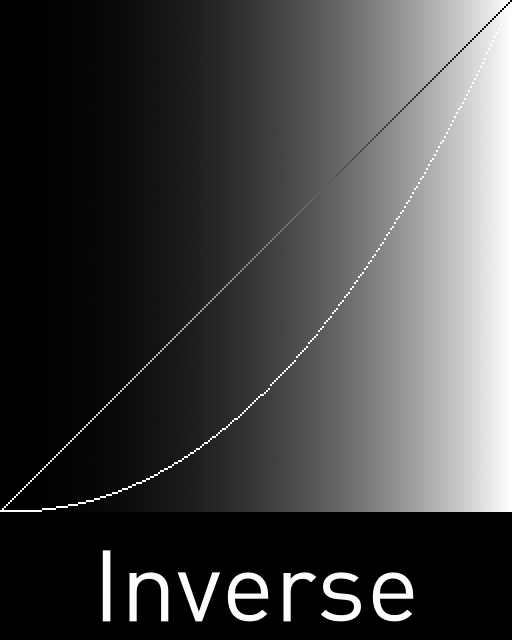
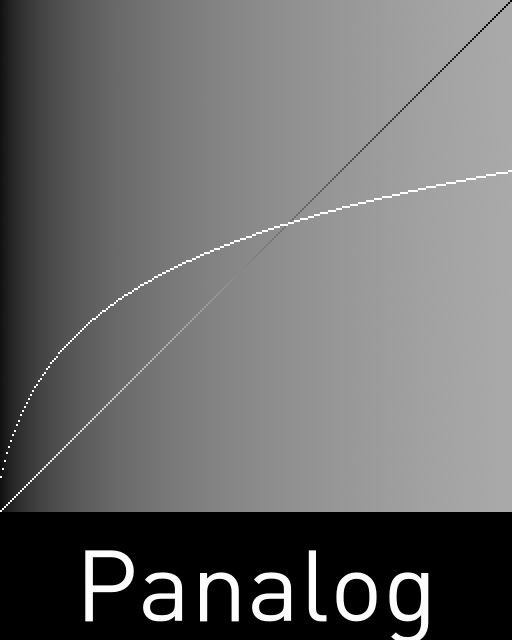
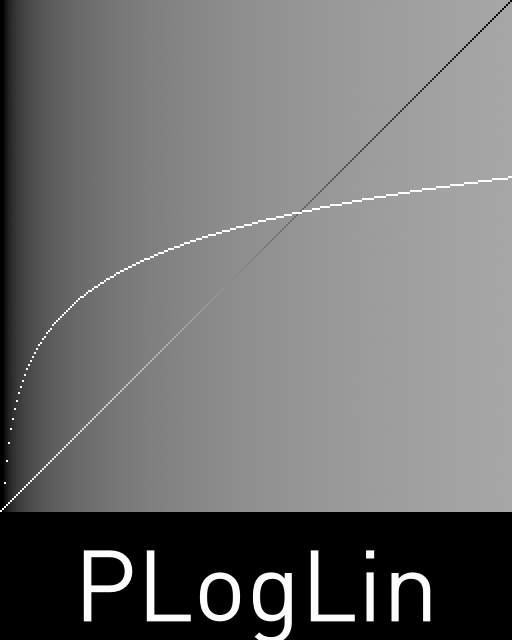
Because compositing is base on math if you were to composite with say sRGB, the math wont work out correctly. This is why LUTs are (sRGB, Rec079, Instagram filters, The matrix green coloring) used at the end for viewing only.

Need to Know : 

As it currently stands only Nuke & Fusion can add post color corrections (also know as Tone Mapping) correctly. Photoshop and After Effects require addition plug-ins. This means if you are doing Animations you can keep your animation/Image Linear, if your doing stills you will need to save your correction out of the V-Ray Frame buffer or use separate render channels option in Vray (this will save/bake your correction) but you are saving the highlight burn into the file.Here are some plugin you can upgrade Photoshop & After Effects.

http://www.dummies.com/photography/digital-photography/types-of-photography/how-to-tone-map-hdr-images-with-photoshop/

Arion FX – http://www.randomcontrol.com/-for-photoshop

Photomatix – https://www.hdrsoft.com/download/pluginwin.html

  • Image >Adjustments >HDR Toning
  • Copy setting above (I’ll keep working on these)
  • Tone Curve and HistogramFirst point: 0, 0
  • Second: 27, 23
  • Third: 89, 90
  • Fourth 100, 93

Use this if you are manually loading in a color correction from 3dsmax.

  1. Load the LUT
    1. NUKE: Load using the Vectorfield Gizmo
  1. Non LUT’s
    1. You can recreate the 3dsmax&VRay style with custom gizmos like :
    1. LINK : https://forums.chaosgroup.com/forum/v-ray-for-3ds-max-forums/v-ray-for-3ds-max-tutorials-tips-tricks/62729-tone-mapping-in-nuke
    2. Or use a expression Node
Expressions, Change the BurnAmount to a number between 0-1
r*(1+r*(BurnAmount**2))/(1+r)
g*(1+g*(BurnAmount**2))/(1+g)
b*(1+b*(BurnAmount**2))/(1+b)

Setting up 3dsmax for correct colorspace

  • Enable gamma / LUT Correction : On
  • Gamma : 2.2
  • Material and Colors : Both On
  • Linear Multiply
  • Gamma : 2.2
  • Dark/Bright Multiplier: 1.0
  • Sub-Pixel Mapping: OFF
  • Affect Background: ON
  • Linear Workflow: OFF
  • Clamp output : OFF

Linear multiply – Simply multiplies the final image colors based on their brightness without applying any changes. The default selection.

Burn value – If this value is 1.0, the result is the same as setting Type to Linear multiply.

None (don’t apply anything) – This can be useful, for example, if you know that you will apply some color correction to the image later on, but wish to keep the rendering itself in linear space for compositing purposes.

sRGB Color Space

Button On or Off?  Pre V-Ray’s manual:

Enable this button. Displays the image in sRGB color space. Click and hold the left mouse button to switch between sRGB color space and ICC.

LINK : Chaos group – sRGB color space

But WHAT does it DO?

  • ON : When on it show you the linear render (computer sees) in sRGB color space (what you see), basically  standard monitor LUT (sRGB)
  • OFF : When off (not highlighted) it is showing you what a linear color (computer sees) looks like in monitor color space (sRGB).

Save to EXR’s w/ Multipass embeded

  • Save your renders through the V-Ray Tab as a raw render
  • Save as Type : OpenEXR image files (*.exr)
  • EXR/VRST/VRSM 32-bit output : Off
  • Deep EXR: Off
  • Dot Delimited frame numbers: On

exr multipart – When enabled, V-Ray will save the multichannel OpenEXR files in a format that is read much faster. Note that this option is only compatible with OpenEXR 2 and above.

Over Bright’s & Blown outs

“WHY IS IT OVER BRIGHT!!!!”. Don’t worry this is normal.

Adjust the Highlight Burn

  1. Turn on your “Show correction Control” in the VRay  window.
  2. Turn on your “Exposure” Control
  3. The Highlight Burn work a lot like the “Burn Value” when using Reinhard.
    1. This is where you’ll get the render close
  4. Other software might call this Soft Shoulder or Soft Clip

“WHY IS IT OVER BRIGHT!!!!”. Don’t worry this is normal.

Adjust your camera exposure

LUT / Cube Workflow

  • Optional to a compositing package : Export out a LUT ( Basically saves the correction you did in the V-Ray window ) fileClick on Globals…
  • Click on Save
  • Make sure to set the save file to .cube as most programs don’t support the .vccglb format